How to add Custom popup window to main screen.
To insert new popup window we need to edit "cnc-screen.xml" configuration file for current profile.
1) Find in cnc-screen.xml section "work-layout", then name of widget in "work-layout" ( see section "widget", attribute "name"inside "work-layout" section).
| <work-layouts> <current>magic <layout name="magic" orientation="horizontal"> <widget name="magic" background="EOT/ts-skin" basewidth="1240" baseheight="1020">myitems |
Name is "magic" for our example.
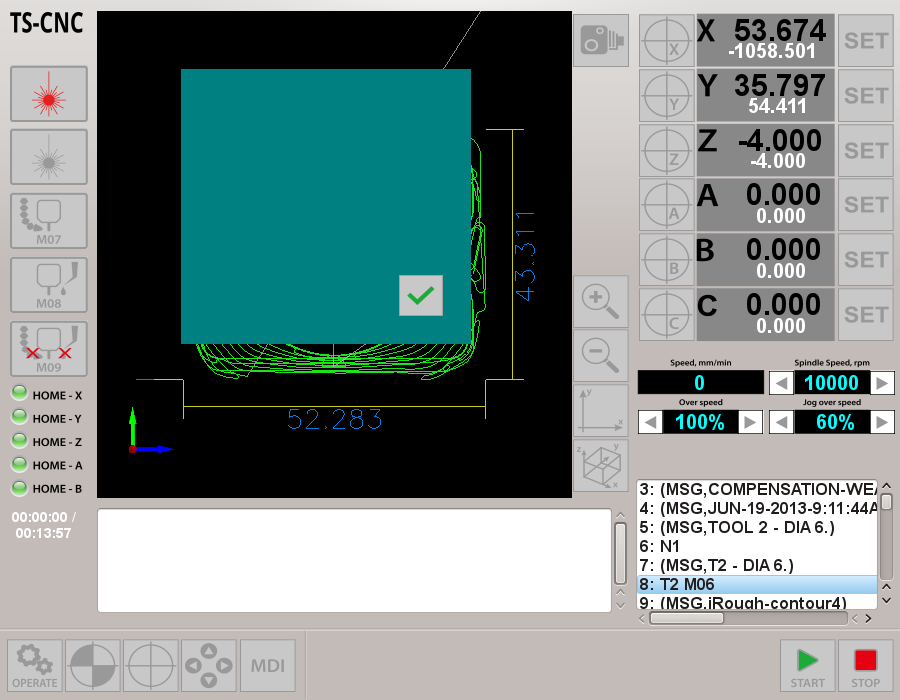
2) Add a line with window definition at the end of "screen" section.
| <gitem where="magic" position="250;100" width="400" height="400" type="myitems" name="ts-message" bgColor="#008080" /> |
- where="magic" (Parent window name to put our Popup)
- position="300;100" (Position of our Popup relative to Parent window)
- width="400" (Based width of Popup window)
- height="400" (Based height of Poup window)
- type="myitems" (Type of Popup window)
- name="ts-message" (ID name of our Popup window)
3) Add button to bottom right corner of the window
|
<gitem where="magic" position="250;100" width="400" height="400" type="myitems" name="ts-message" bgColor="#008080" /> |
- where="ts-message" (Parent window name to put the button. It's our Popup name "ts-message")
- position="340;340" (Position of button relative to Popup window)
- width="60" (Based width of the button)
- height="400" (Based height of the button)
- type="button" (Type of Button)
- image="EOT/_ok" (Ptha and Filename of button skin image in "SVG" format)
- action="mywidget-hide:ts-message" (Action ID - what to do when button pressed - hide windows by name)
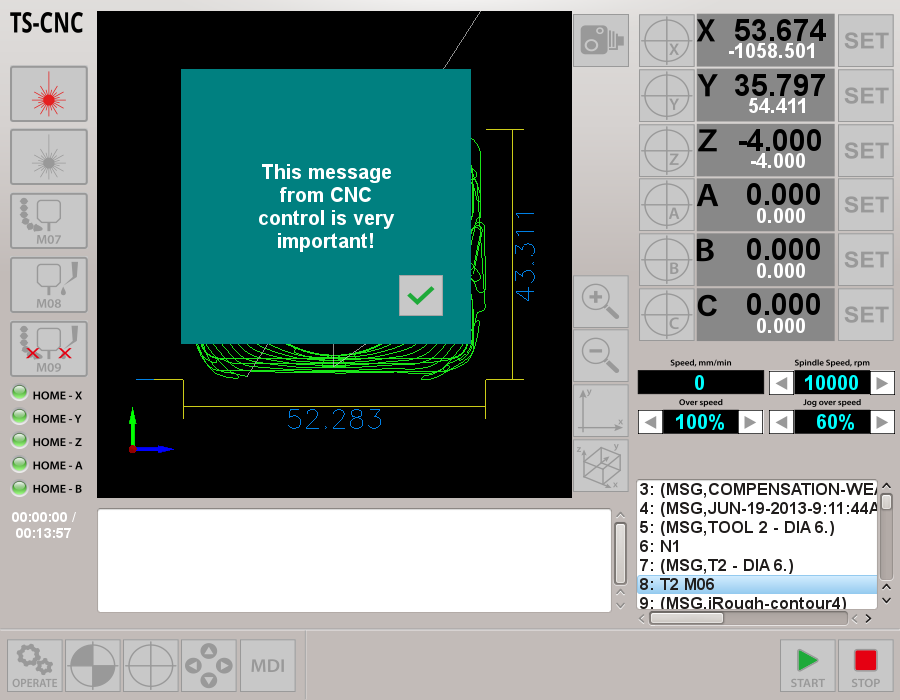
4) Add text message to the WIndow
|
<gitem where="magic" position="250;100" width="400" height="400" type="myitems" name="ts-message" bgColor="#008080" /> |
- where="ts-message" (Parent window name to put the button. It's our Popup name "ts-message")
- position="100;100" (Position of Text Label relative to Popup Window)
- width="200" (Based width of the Text Label)
- height="200" (Based height of the Text Label)
- type="label" (Type for Text Label)
- labelFgColor="black" (Label Foreground Color - Label Text Color)
- labelFontSize="25" (Fpont size for Text)
- labelBgColor="transparent" )(Background color for Text Label)
- <message>.....
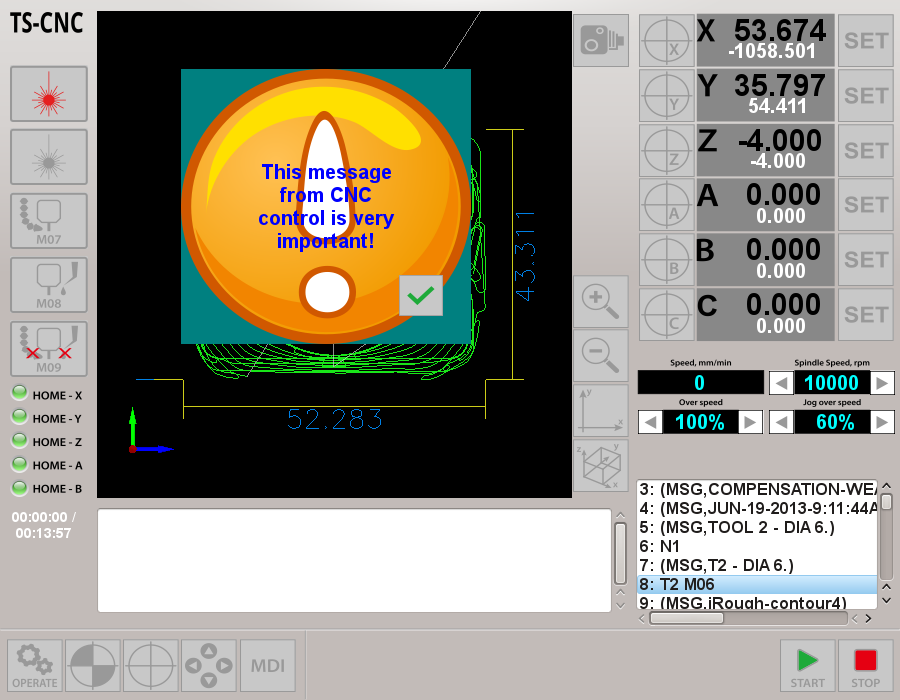
4) Set skin image for Popup Window - add attribute "background" and name anf path to skin image file in SVG format -
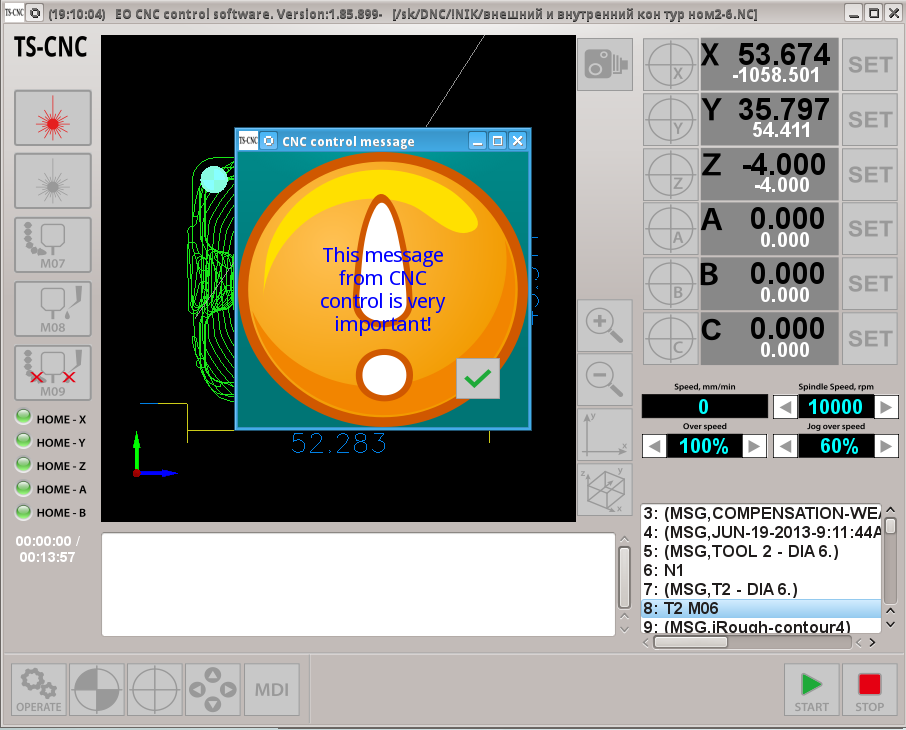
background="custom/attention-r"
|
<gitem where="magic" position="250;100" width="400" height="400" type="myitems" name="ts-message" bgColor="#008080" background="custom/attention-r" /> <gitem where="ts-message" position="300;300" width="60" height="60" image="EOT/_ok" action="mywidget-hide:ts-message" type="button" /> <gitem where="ts-message" position="100;100" width="200" height="200" type="label" labelFgColor="blue" labelFontSize="20" labelBgColor="transparent"> |
Label color was changed to "blue" -
where="ts-message" (Parent window name to put the button. It's our Popup name "ts-message")
labelFgColor="blue"
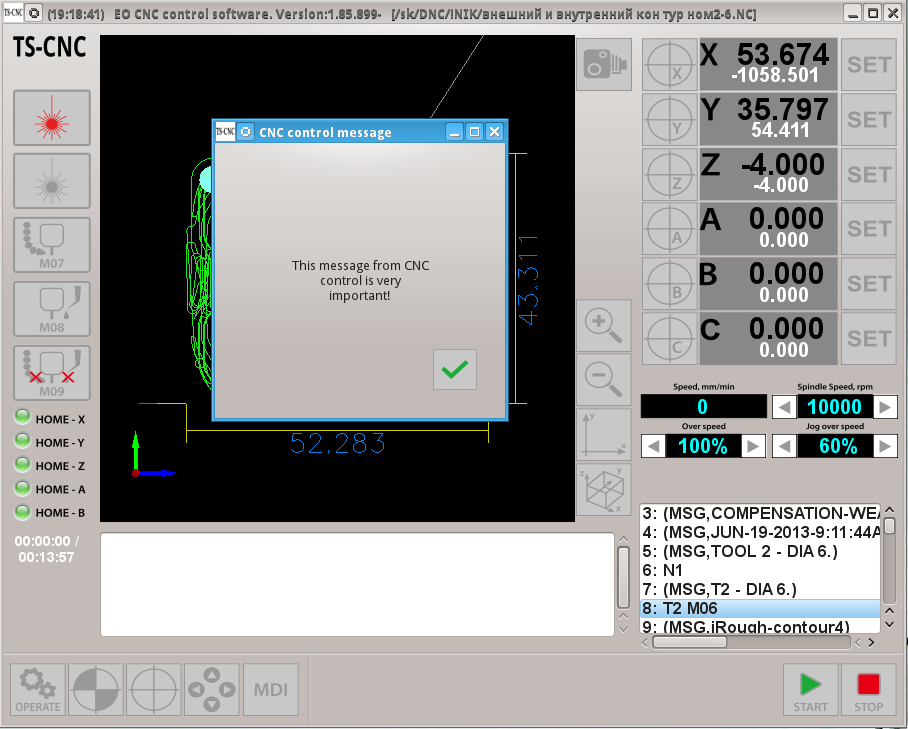
5) Change Popup window to standard framed window - added attributes:
- wf="window" (Framed window definition)
- caption="CNC control message" (Caption for Popup window)
| <gitem where="magic" position="250;100" width="400" height="400" type="myitems" name="ts-message" wf="window" caption="CNC control message"/> <gitem where="ts-message" position="300;300" width="60" height="60" image="EOT/_ok" action="mywidget-hide:ts-message" type="button" /> <gitem where="ts-message" position="100;100" width="200" height="200" type="label"> <message>This message from CNC control is very important! |
6) Simple Framed Popup Window definition (with button and text message)
| <gitem where="magic" position="250;100" width="400" height="400" type="myitems" name="ts-message" bgColor="#008080" background="custom/attention-r" wf="window" caption="CNC control message"/> <gitem where="ts-message" position="300;300" width="60" height="60" image="EOT/_ok" action="mywidget-hide:ts-message" type="button" /> <gitem where="ts-message" position="100;100" width="200" height="200" type="label" labelFgColor="blue" labelFontSize="20" labelBgColor="transparent"> <message>This message from CNC control is very important! |
Demo Video with popup window definition
{avsplayer videoid=2}