ET7 Hardware Troubleshooting Checklist
The following steps need to be taken in order to check the hardware functionality of an ET7 controller board:
1. Connect the power supply to the board
a. Three LEDs on the side of the board close to the power supply should light up. These LEDs signal that power has been connected successfully: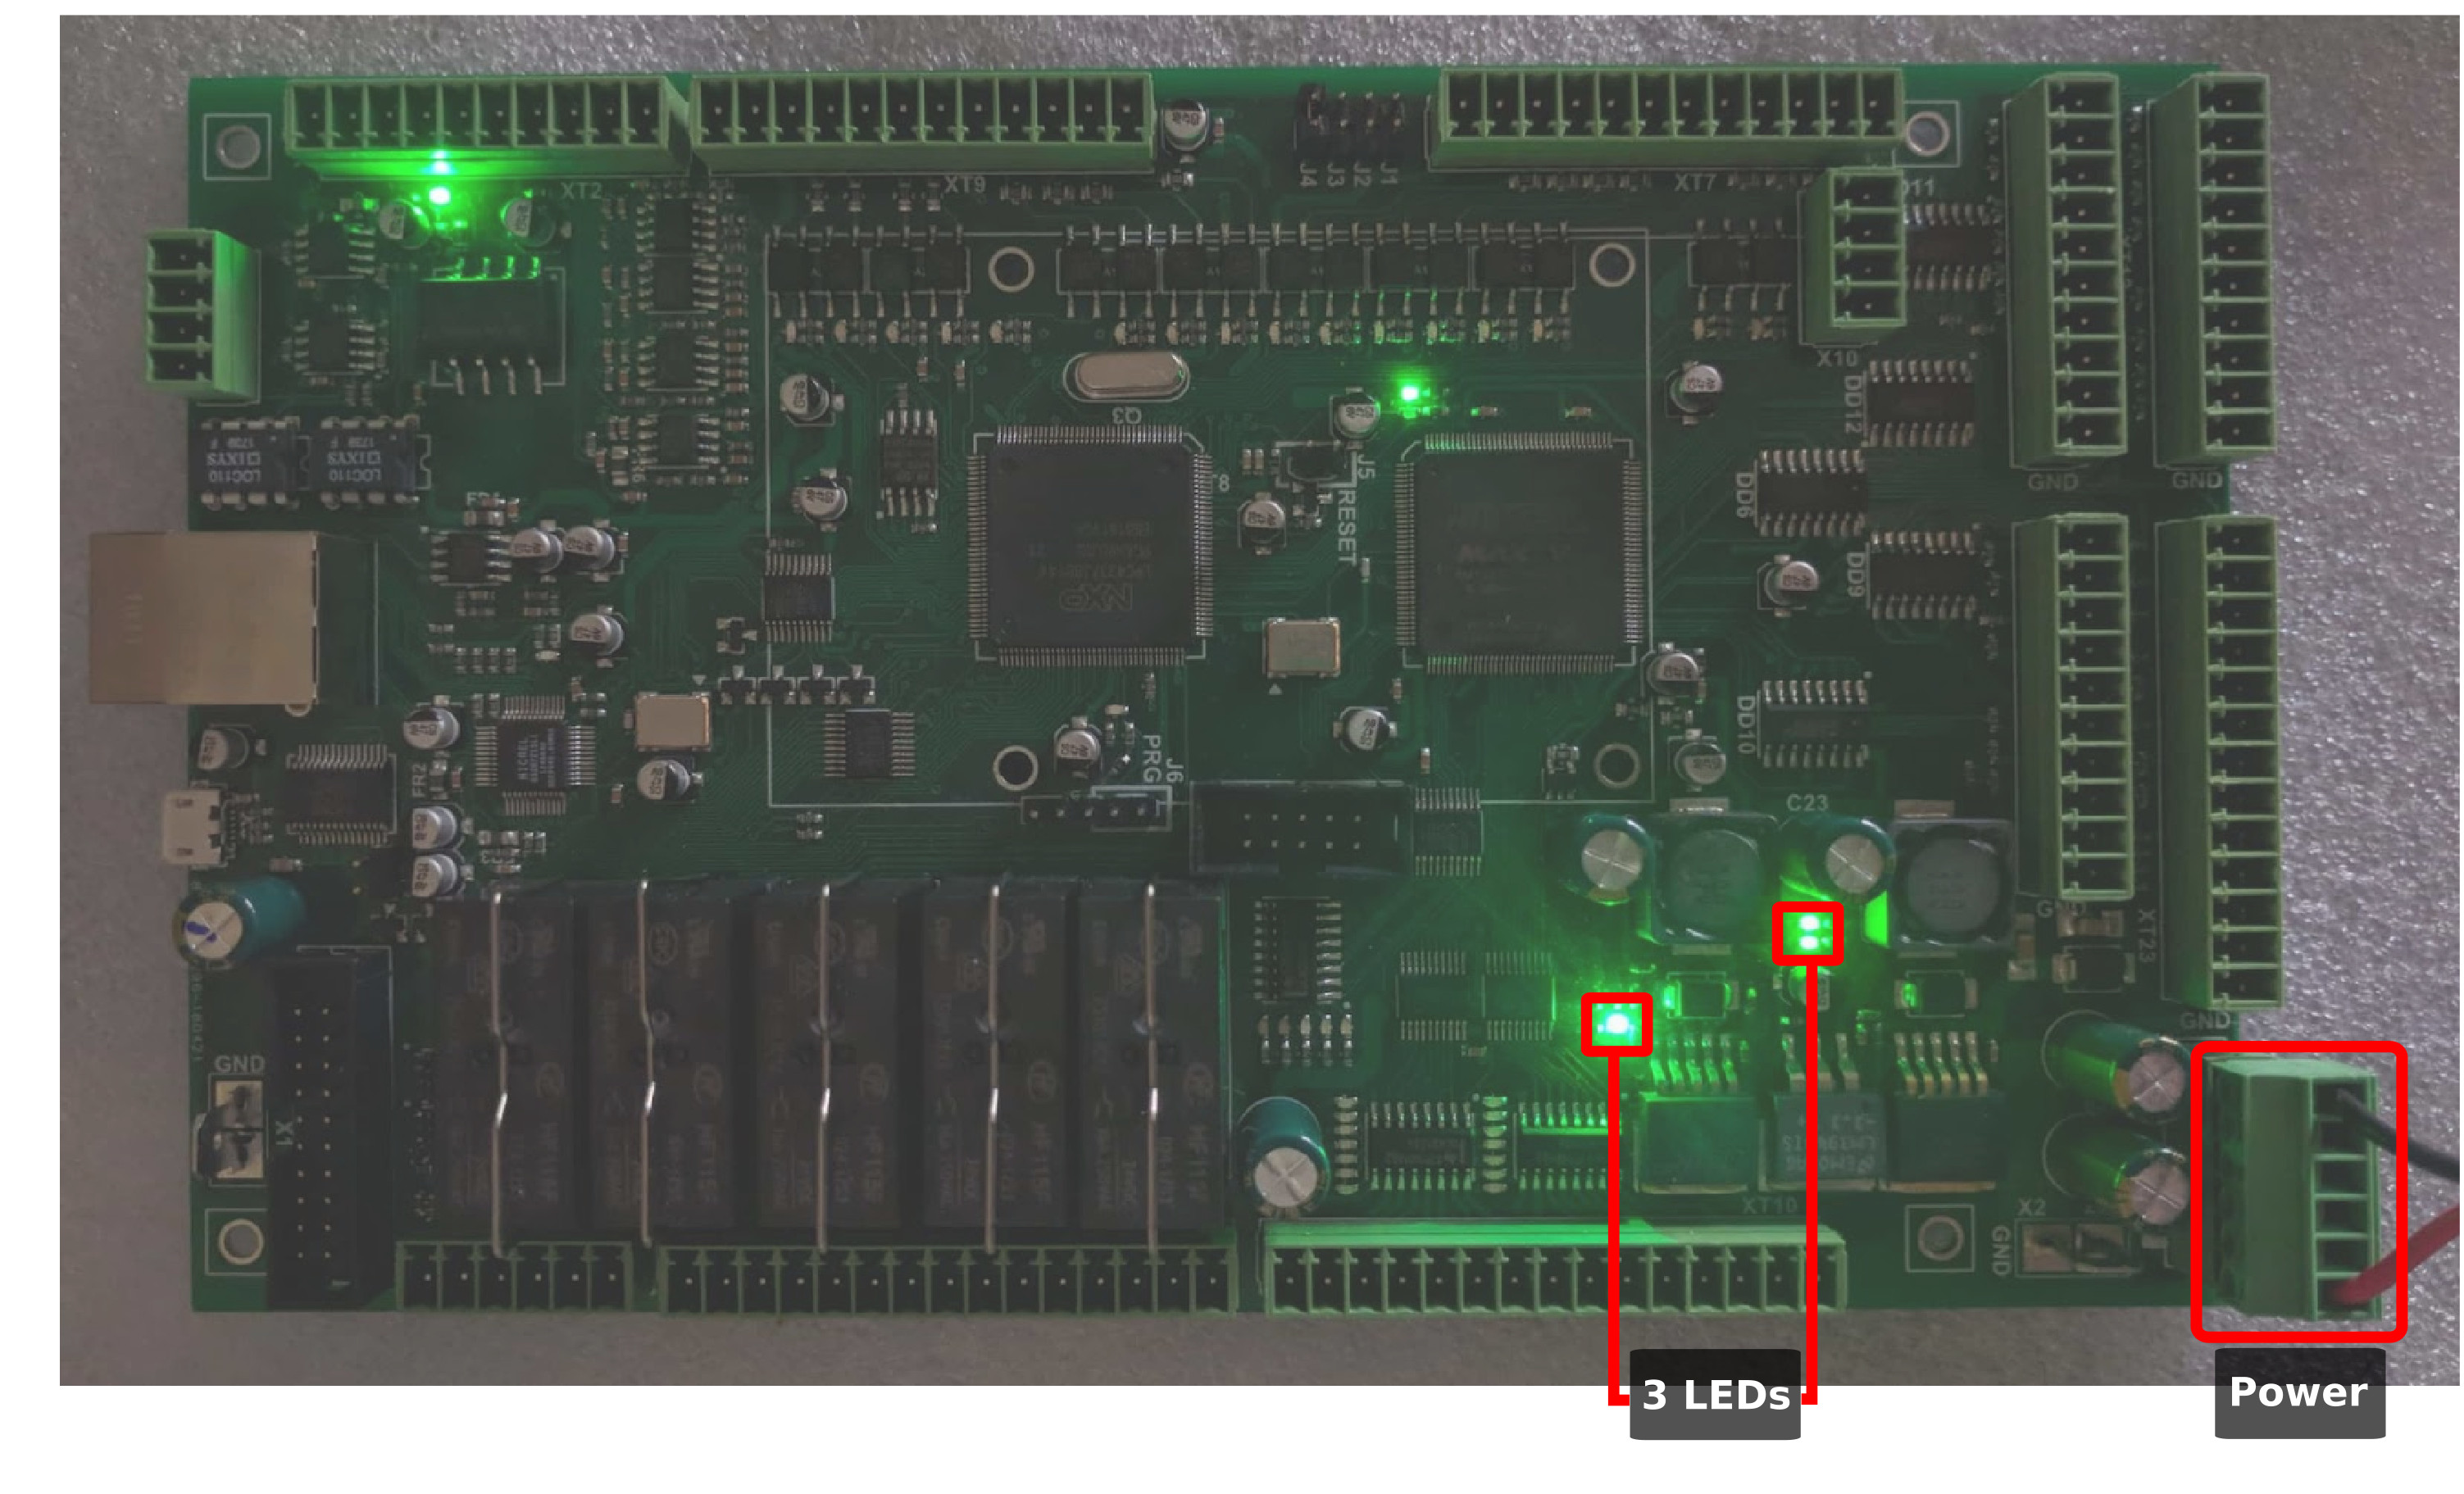
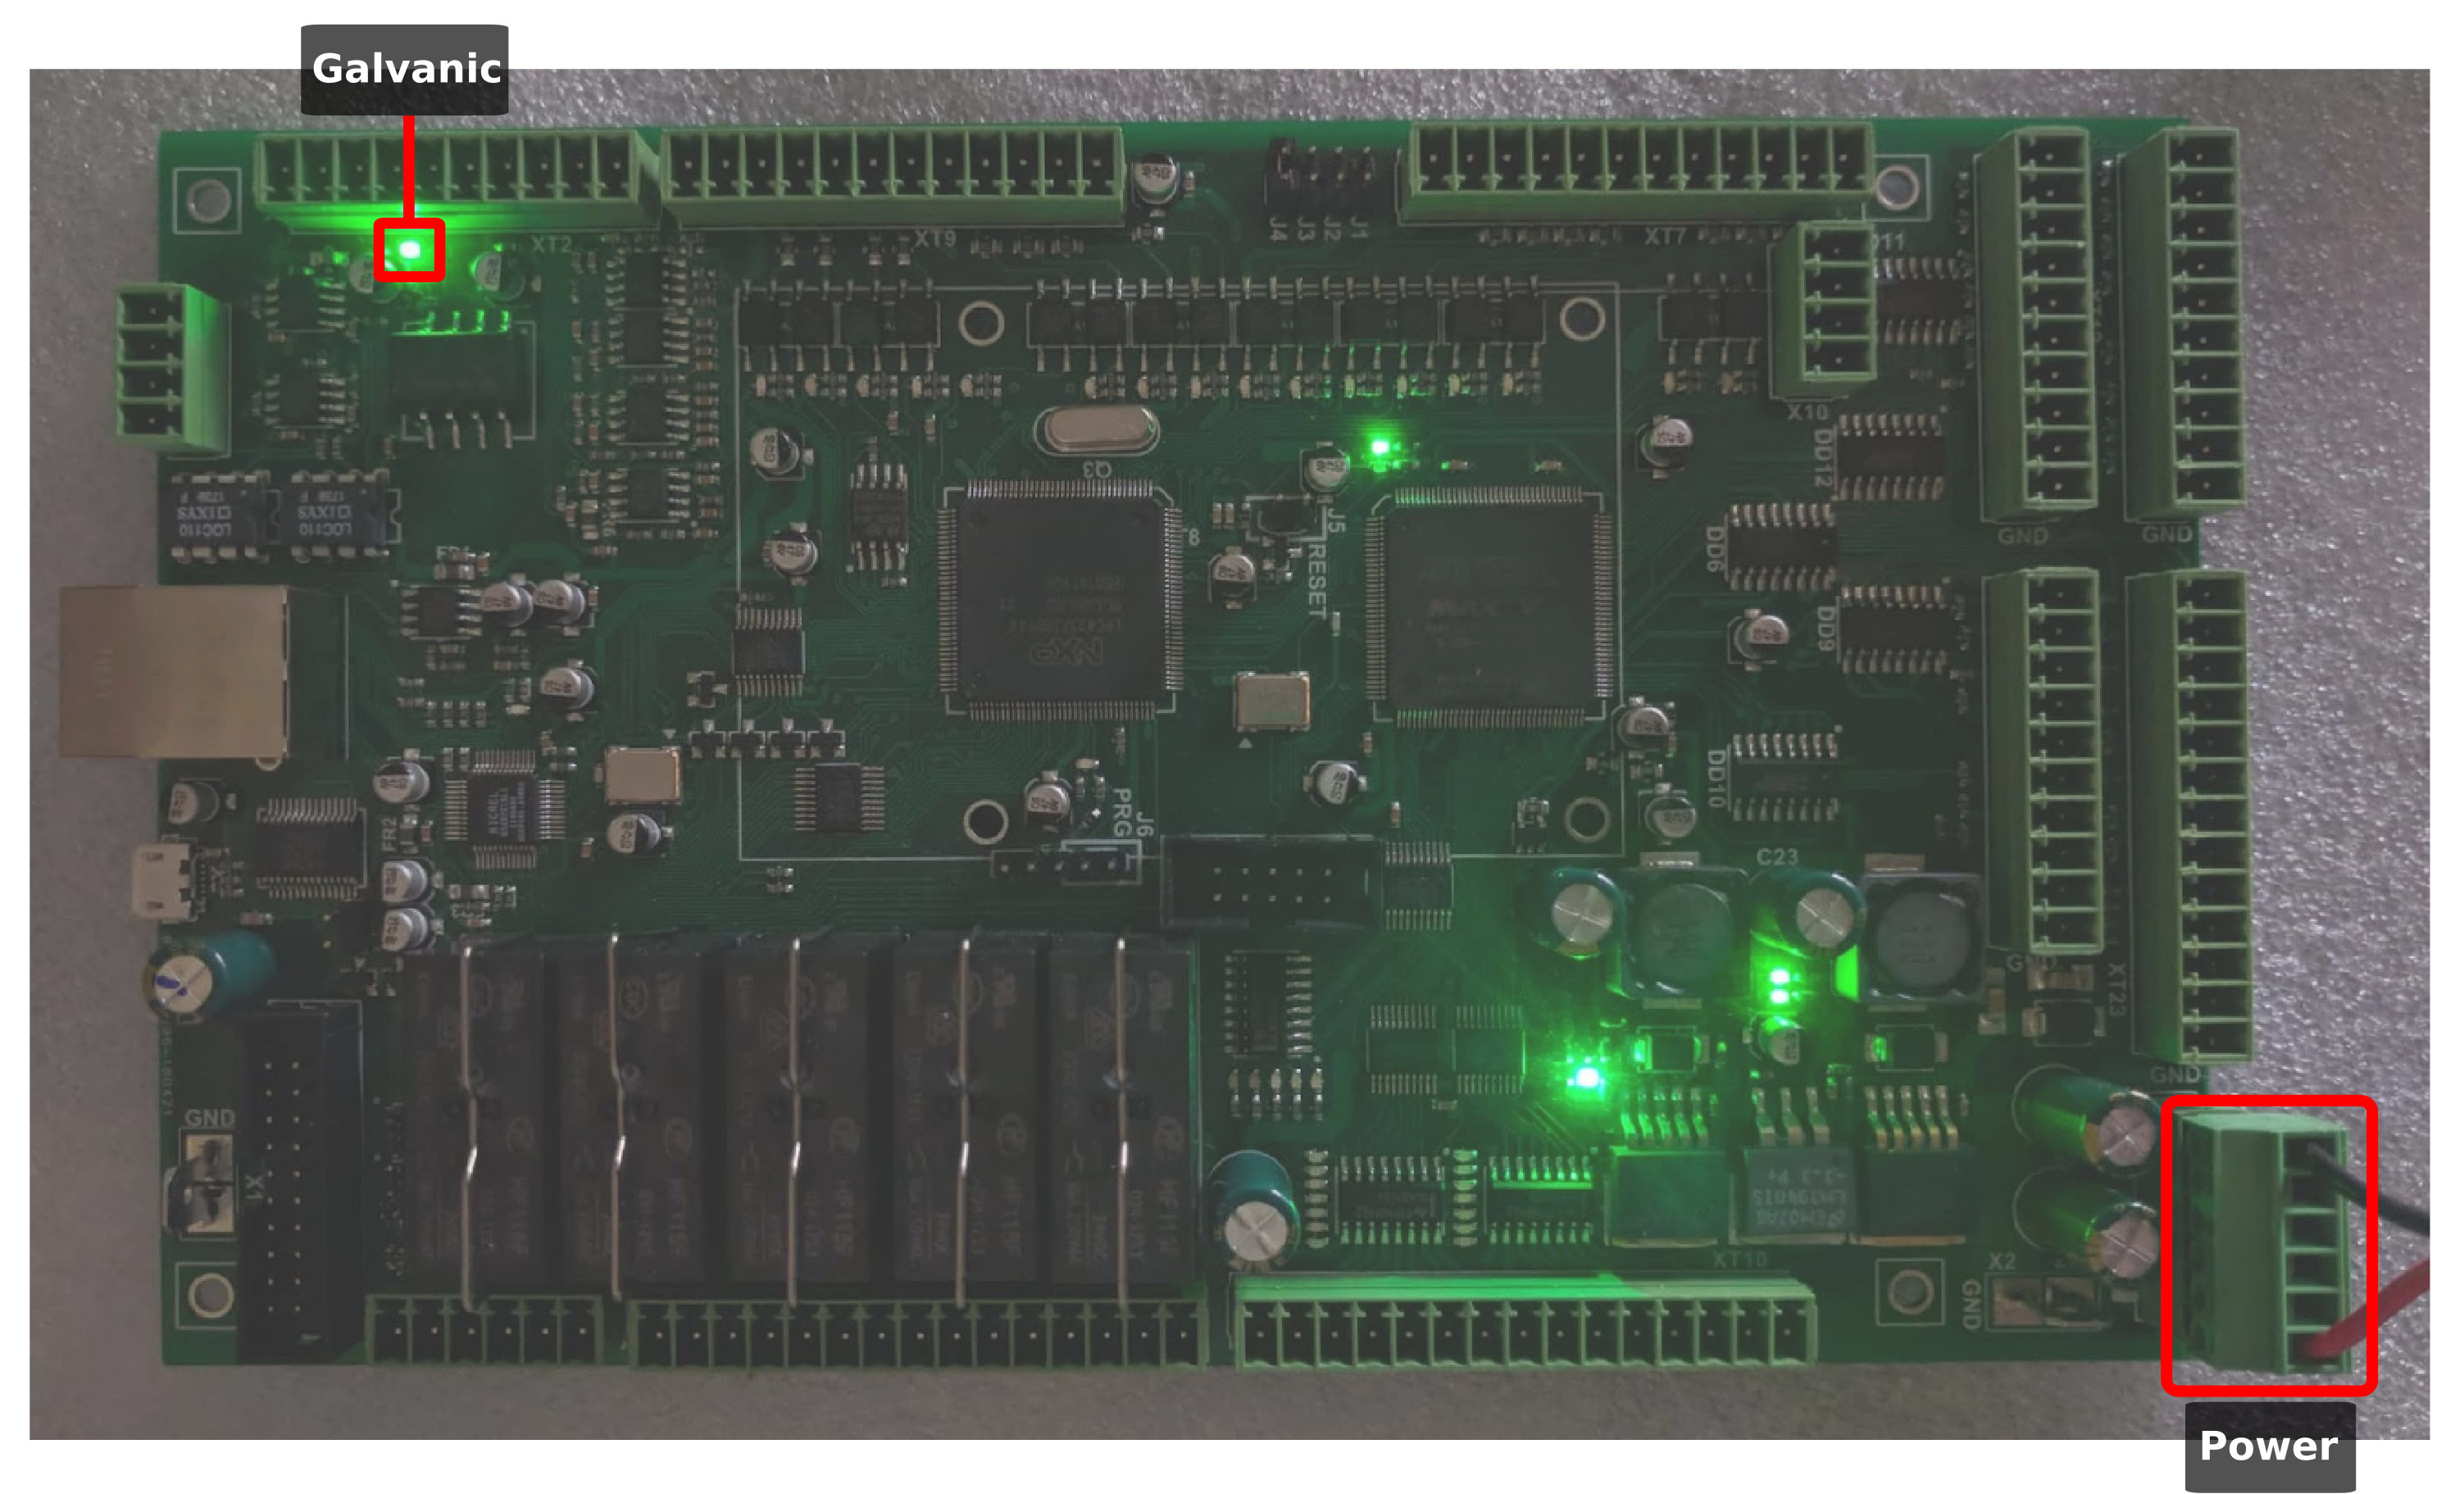
b. The LED on the far side of the board should light up, indicating that power has been supplied to the galvanic input cells:
c. Two LEDs near the processors should also light up, one solid and one blinking at about 1 blink per second. This signifies that the processors are functional: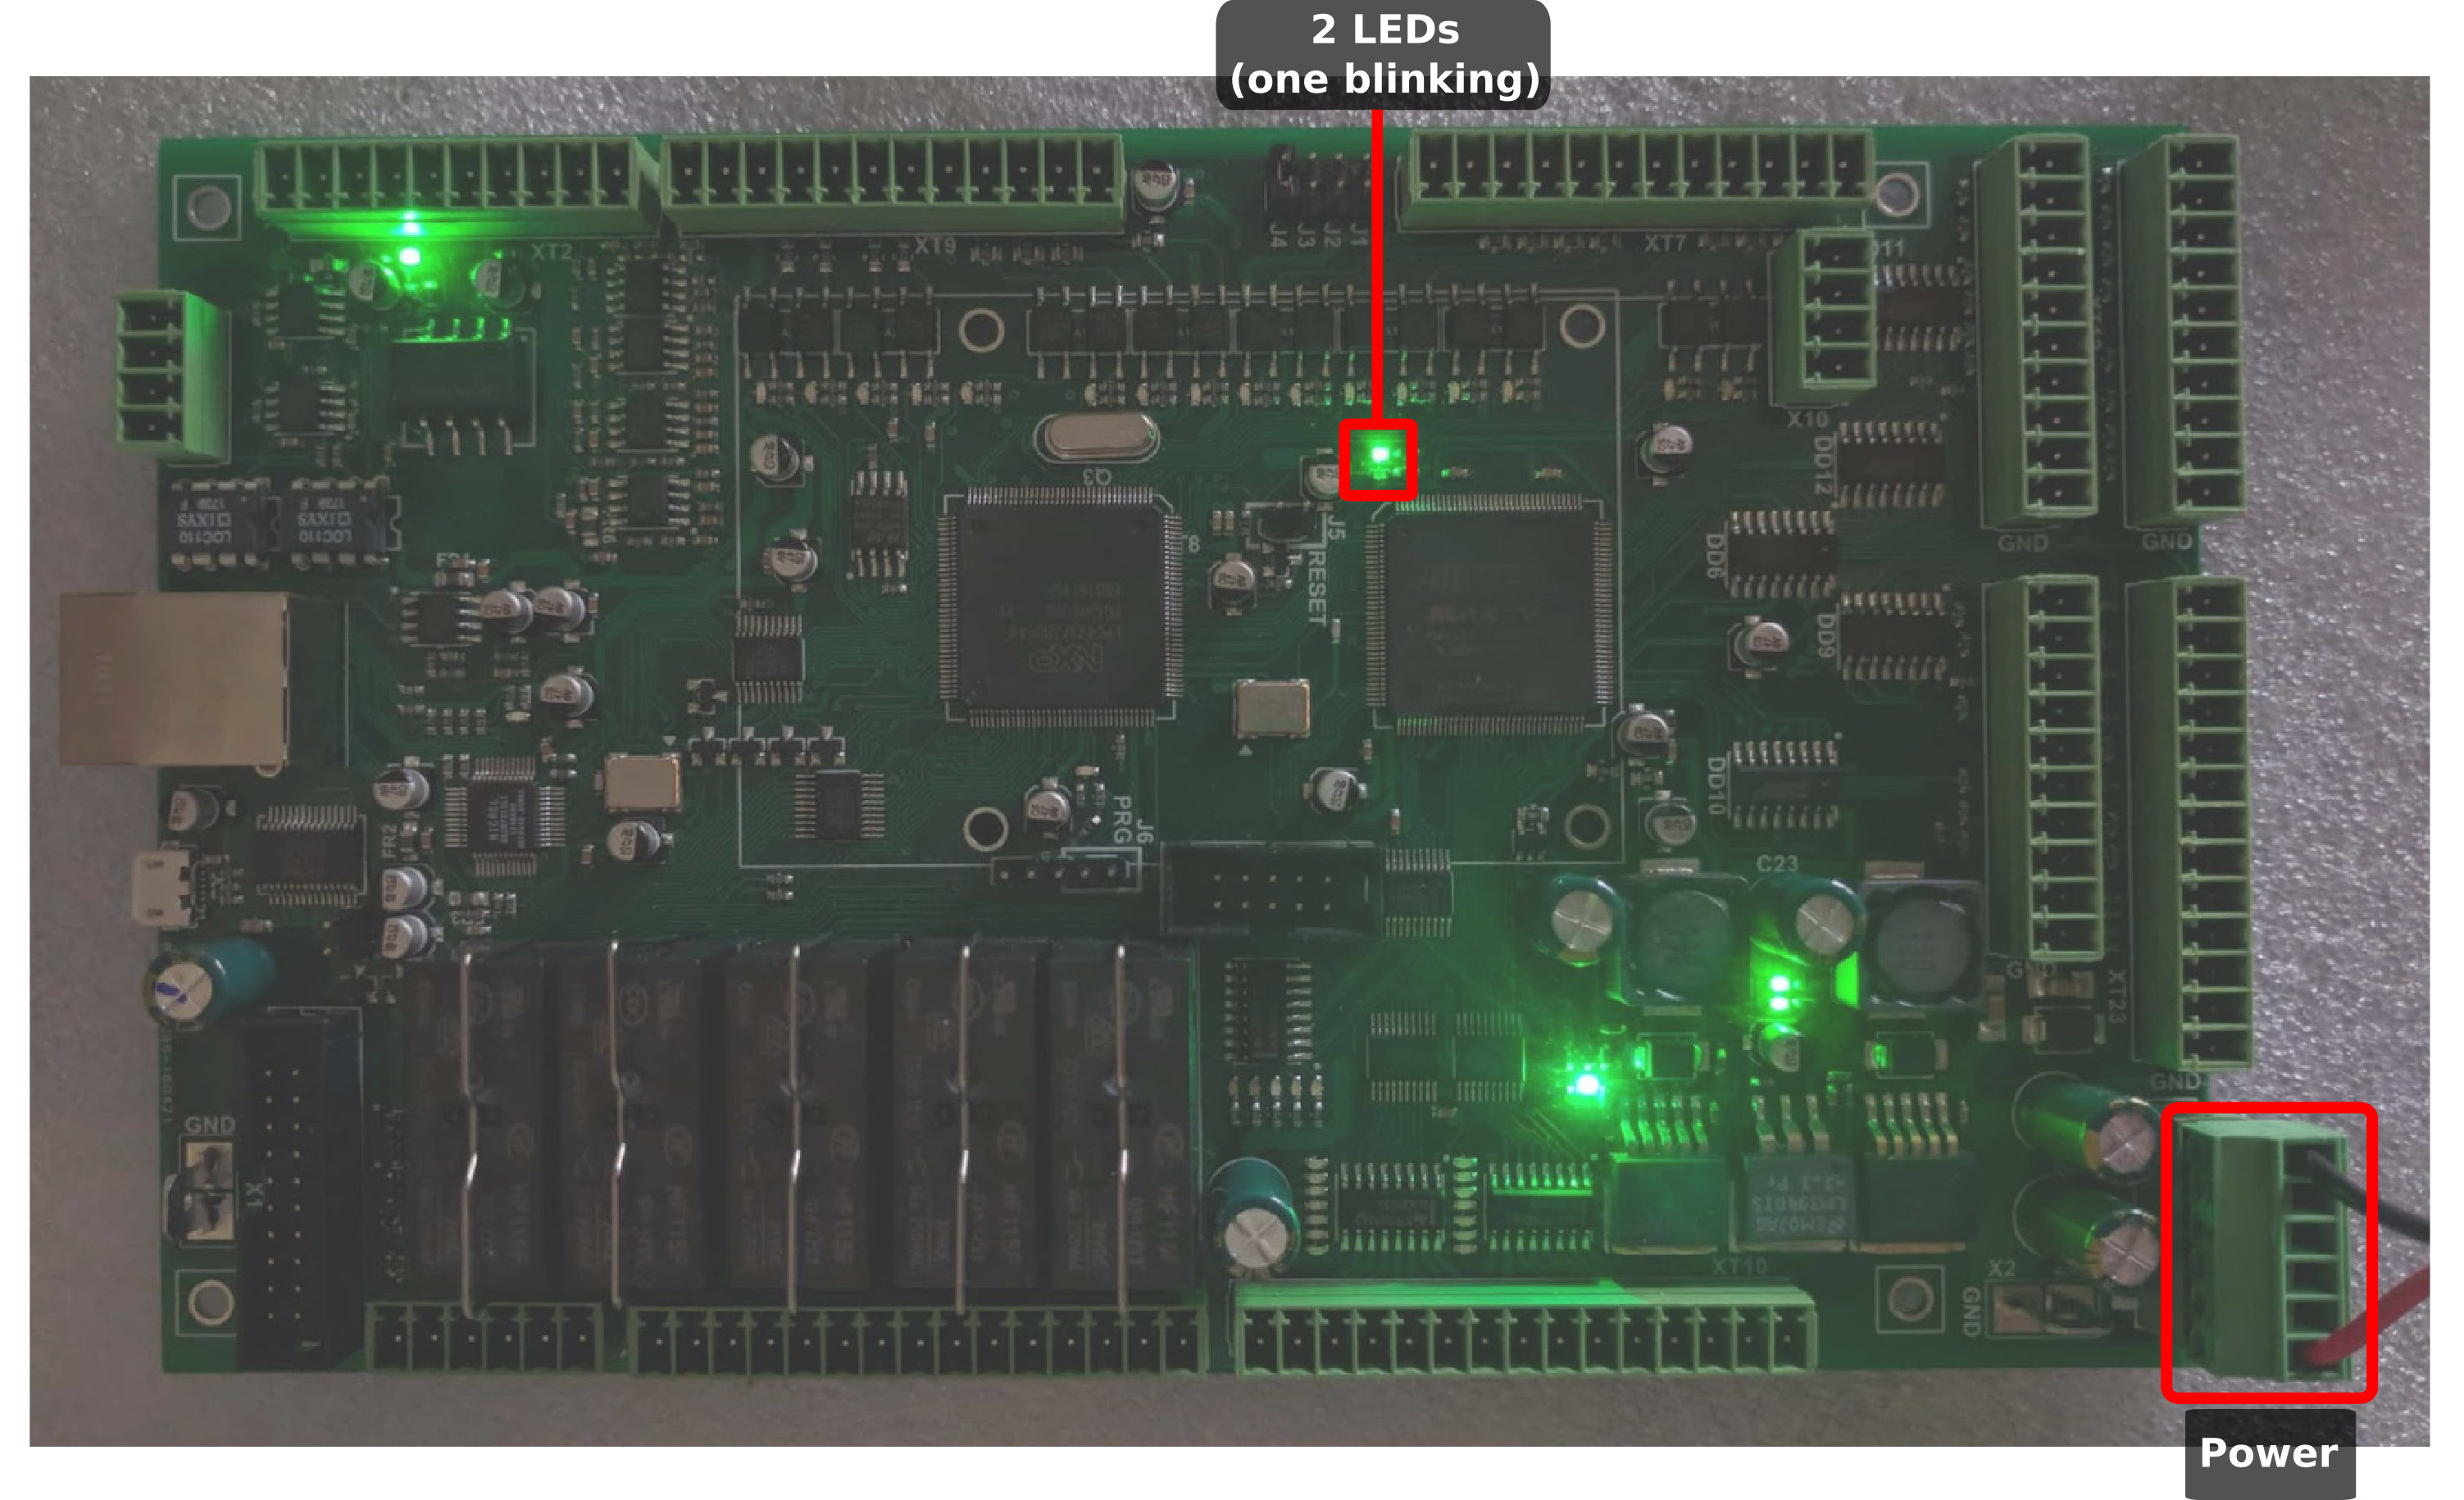
Overall, 6 LEDs should light up after supplying power to the board.
2. Connect the LAN cable to the board
a. The LED near the LAN cable port should light up, indicating that the controller has been connected to the network: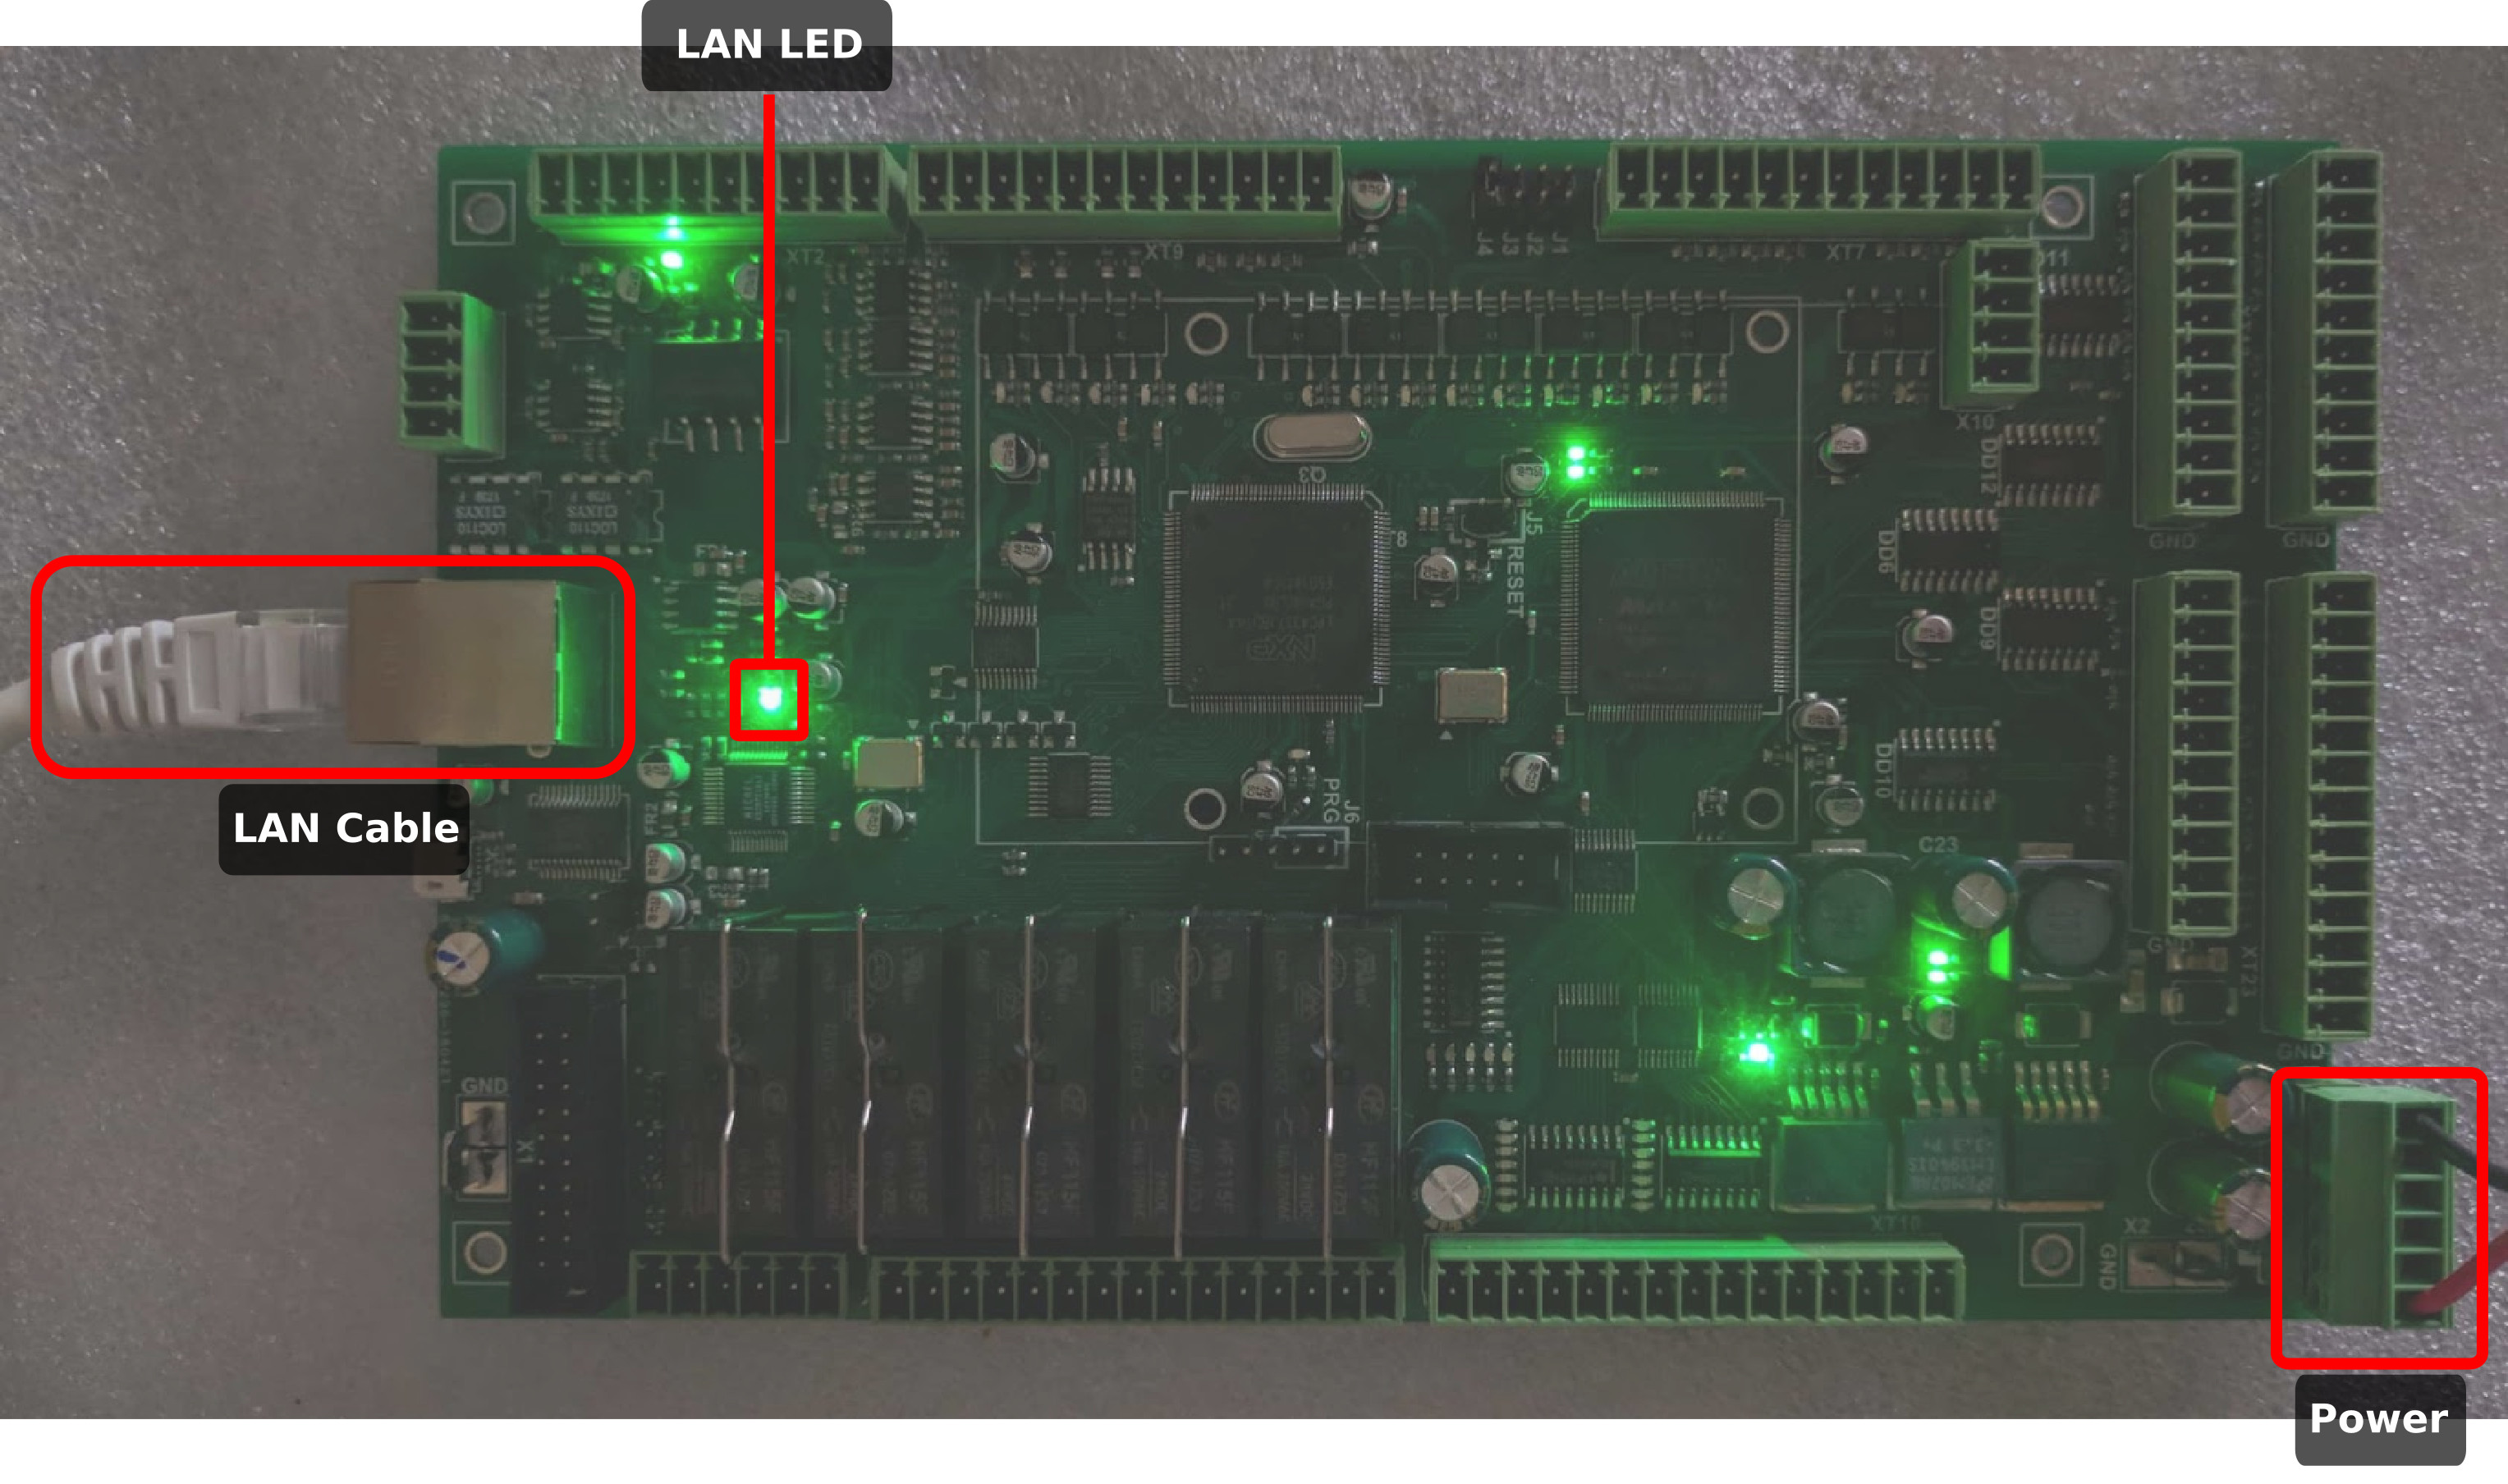
Overall, 7 LEDs (with one of them blinking) should be light up at this point.
The hardware troubleshooting for ET7 is now complete. If any of the LEDs are not on after the steps have been completed, their respective components may be damaged and/or not functioning properly.